Inductions
Induct workers onto site and keep their records current.
Part of Resource Management.
Found in each project and your organisation. What's the difference?
Hosts set it up and approve; guests register and see only their own workers.
Inductions holds the site induction of every worker on a project: who they are, who they work for, their licences, the induction content they completed, and whether the host approved it. It also records who signs in and out at the gate.
Each worker has one worker record, and an induction for each project they work on. The worker record holds their details and licences, and is shared across the host organisation's projects.
In the project sidebar, under Resource Management, select Inductions. The register has three tabs: Register, Awaiting Approval and Expired Licenses.
An induction's status is one of:
- Awaiting Induction: created on the project without the induction content, and waiting for review.
- Awaiting Approval: completed by the worker on the public portal, and waiting for review.
- Pre-Approved: cleared to start work, with a final approval to come.
- Approved: inducted.
- Rejected: refused, with a reason.
- Invalidated: the worker needs to induct again.
- Deactivated: switched off.
Learn more about the register screen.
A worker inducts themselves on the project's public portal, with no Teralo account. To give workers the link, select QR Code on the register, which opens Induction QR & Link.
- On the portal, select New Induction.
- Enter the Mobile Number, and select Send Verification Code.
- Enter the six-digit code from the text message, and select Continue. The code works for 10 minutes.
- Work through the ten steps: Organisation, Personal, Contact, Emergency, Vehicle (optional), Licences, Medical, SWMS, Induction and Declaration. Teralo skips the medical and SWMS steps when there's nothing to answer.
- Select Submit Registration.
The induction moves to Awaiting Approval, and the worker is sent their worker ID by text message. A worker the host already knows by that phone number sees Existing profile found on the personal step, and can select Use This Profile or Start Fresh.
A worker can sign in only once their induction is approved or pre-approved.
On the Organisation step, the worker chooses their employer from the host organisation, the guest organisations with people on the project, and the host's own employers list.
If their employer isn't listed, the worker can type its name and select the option to add it as a new employer. The host resolves the name when reviewing the induction, which can't be approved until it is resolved. When Employer Self-Declaration is off, the worker is asked to contact the site administrator instead.
On the Personal step, the worker records their preferred language. A worker who needs an interpreter turns on I need an interpreter and enters the interpreter's name and phone number. On the Declaration step, the interpreter ticks the Interpreter Declaration, and Teralo records the time.
On the Induction step, the worker completes each section of the induction content, in order: the organisation's Company content, the Region content the project uses, then the Project content. A section holds text, PDF slides and videos.
The worker selects Mark as Read at the end of each section, or Proceed to Test if it has a test. A test has multiple choice and true or false questions, and a pass score. A worker has 3 attempts at each test; after that, they need a new verification code to try again.
Every section has to be completed before the worker can continue. Each induction completes every section, including sections the worker completed on another project.
- On the register, select Create Induction.
- Optionally, under Link to Existing Worker, search for the worker by name or mobile number.
- Choose the Employer Organisation.
- Enter the worker's Personal Details, Contact Details, Emergency Contact, Vehicle Details, licences and Medical Declaration.
- Select Create Induction.
The induction is created as Awaiting Induction and goes to review. It has no induction content, language, interpreter or SWMS sign-ons. Guests create inductions for their own company only.
Host staff with Can approve, reject, flag, and manage all inductions can select Create & Approve instead. The induction is approved straight away, without a workflow, and the worker gets a worker ID.
- Open the induction.

- On the Review registration step, select Approve or Pre-approve, or select Reject and enter the reason in Notes.
If the worker added a new employer, resolve it first on the Employer needs review card: choose an existing organisation and select Use selected, or add the employer.
- Approve: the induction is approved. The worker gets a worker ID, a six-digit code, if they don't have one.
- Pre-approve: the worker can sign in, and the induction moves to a Final approval step, with Approve and Reject. Pre-approving doesn't give a worker an ID; a worker who inducted on the portal already has one.
- Reject: the induction is closed. Only Reactivate reopens it.
To review, you need Can approve, reject, flag, and manage all inductions and to be assigned to the step.
Open the induction, and select the three dots beside Export PDF:
- Invalidate, then Invalidate to confirm: ends any review in progress and, if the worker has an email address, emails them a link to induct again.
- Deactivate: switches the induction off, and emails the worker's employer.
- Reactivate: starts a new review of a rejected, invalidated or deactivated induction.
These need Can approve, reject, flag, and manage all inductions.
- Open the induction and select the three dots beside Export PDF.
- Select Flag for Project, or Flag Company-Wide to flag the worker on all the host's projects.
- Enter the reason, and select Flag Worker.
A flag doesn't stop the worker signing in. The kiosk asks them to speak to their supervisor, without the reason. Signing in on the portal's Sign In / Sign Out page also emails the host's people on the project. To remove a flag, select Unflag Project or Unflag Company.
A worker's licences belong to their worker record, so they follow the worker across the host's projects. Each licence has a number, issuing authority, issue date, expiry date and a scan of the card.
Teralo starts each organisation with eight licence types, including General Construction Induction (the White Card), Working at Heights and First Aid. Add your own on the License Types tab of the organisation's Inductions settings.
Host staff with Can approve, reject, flag, and manage all inductions manage a worker's licences on the induction's Licences & Certifications card:
- To add one, select Add licence.
- To edit, verify or delete one, open its menu (Licence actions) and select Edit, Mark as verified or Delete.
Deleting a licence removes it from the worker on every project.
The Expired Licenses tab lists every licence on the project that has expired or expires within 30 days, oldest first.
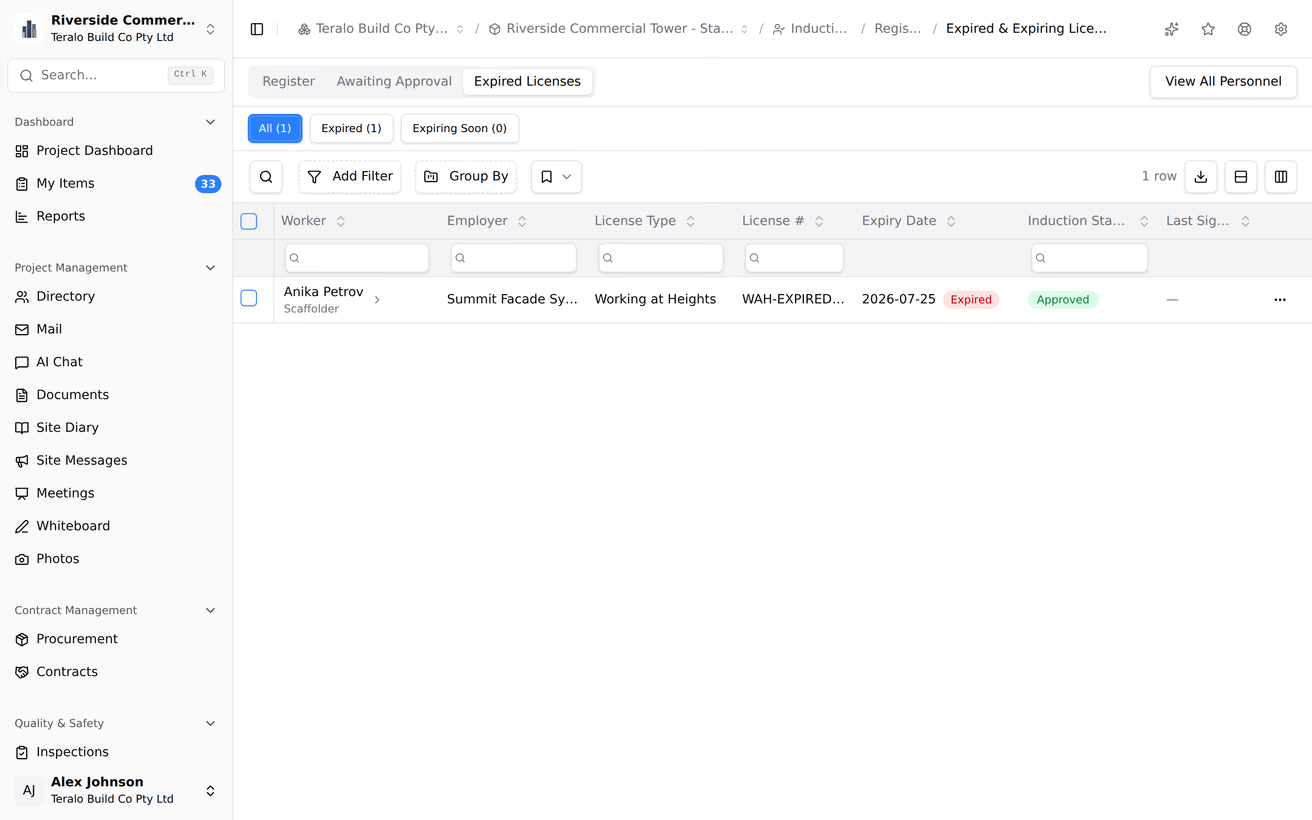
An expired licence doesn't stop a worker signing in, or change their induction.
The sign-in kiosk runs on a tablet at the gate, from the project's Kiosk URL (on the Kiosk tab of the Inductions settings). Nobody signs in to Teralo to use it.
- Select Sign In, then Inducted Worker.
- Find your record by Worker Code (the six-digit worker ID), by Date of Birth, or by Face if the project uses face recognition.
- Confirm the acknowledgements.
- Optionally, take a photo, and sign under Signature.
- Select SIGN IN.
To sign out, select Sign Out and find your record. The kiosk checks that the tablet is within 500 metres of the site.
The public portal's Sign In / Sign Out page signs a worker in on any device:
- Enter the Worker ID and select Find Worker, or select Scan QR Code and scan the worker's QR code.
- Select Sign In or Sign Out.
A worker's QR code is on their profile, under Site Sign-In QR Code.
- On the kiosk, select Sign In, then Visitor.
- Enter the First Name, Last Name and Company, and optionally the Contact Phone, Purpose of Visit and who you're visiting.
- Select Continue.
To sign out, a visitor selects Sign Out and finds their record by name.
Only a worker whose induction is Approved or Pre-Approved can sign in. A worker already signed in has to sign out before signing in again. When Block Sign-In on Unsigned Method Statements is on, a worker with an unsigned method statement is refused.
Nobody is signed out automatically, so a worker who doesn't sign out stays signed in.
Face recognition is off until the project turns it on. Each worker then chooses whether to consent, on the personal step of the portal.
The worker's phone makes a face template, which Teralo stores and sends to the kiosk tablet, where the match is made. To withdraw a worker's consent and delete the template, open the induction's three-dot menu and select Withdraw Face Recognition Consent.
Workers sign on to the method statements assigned to them during the induction, by an emailed link, in person with a signature, or at the kiosk. Each sign-on records the method statement's version. A new version cancels the sign-ons to the previous one, and those workers sign on again. Learn more about method statements.
An approved worker updates their own record from the public portal:
- On the portal, select Update My Record.
- Enter a phone number or email address.
- Open the link Teralo sends, by email if it can, otherwise by text message. The link works for 48 hours.
The worker can change their address, emergency contact and vehicle, add licences, change their face recognition consent and sign method statements. Their name, email address and phone number can't be changed this way.
A worker's email address, phone number, address, emergency contact, vehicle and medical declaration are locked. To see them:
- On the induction's Contact Details card, select the locked details.
- Enter why you need them.
- Select View Confidential Data.
Teralo records the reason in the induction's activity log, with your name.
- Timesheets: a timesheet names anyone who signed in that day but isn't on it. Learn more about timesheets.
- Equipment: approved and pre-approved workers can be added as a machine's operators. Learn more about equipment.
- My Items: inductions awaiting approval appear in My Items for reviewers, and rejected ones for the worker's employer.
Warning: Deleting an induction is permanent. Deleting a worker's last induction also deletes their worker record and licences.
- On the register, open the induction's three-dot menu and select Delete Induction.
- Confirm the deletion.
In the organisation sidebar, under Registers, select Inductions. The organisation register lists every company's workers inducted onto the projects your organisation hosts, wherever you can view inductions, with their employer, worker ID, sites, licences and last sign-in.
Only a host organisation has the organisation register. Learn more about organisation level and project level.
A guest sees the inductions their own company created, and any whose workflow they take part in. They create inductions for their own company only, and can't use Create & Approve or change licences.
None of the induction permissions is limited to the host. A guest with Can approve, reject, flag, and manage all inductions can review their own company's inductions.
The settings are on the project. In the project sidebar, under Project Settings, select Tools, then Inductions. The tabs are Job Titles, License Types, Medical Questions, Employers, Content Tiers, Project Settings, Workflows, Kiosk and Gate Events.
- Job Titles and Medical Questions: lists set at organisation level, which a project can add to.
- License Types: set at organisation level only.
- Employers: the host's list of employers workers can choose from, shared across its projects.
- Content Tiers: the project's own induction content, as below.
- Project Settings: the Region Tier, Employer Self-Declaration, Face Recognition, Induction Number Prefix (IND to begin with), Block Sign-In on Unsigned Method Statements and Require a Photo at Registration. Workers always enter a verification code, whatever the SMS Verification switch says.
- Kiosk: the Kiosk URL for the sign-in tablet.
The PPE signs on the public portal are set in the Public Site tool.
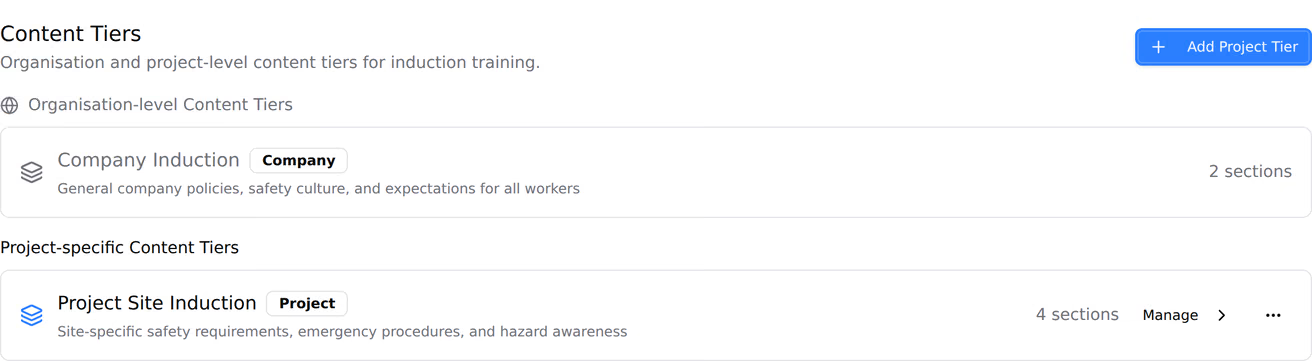
- At organisation level, in the organisation sidebar, under Organisation Settings, select Tools, then Inductions, then Content Tiers. Select Add Content Tier, and choose Company or Region. On a project, select Add Project Tier instead.
- Open the tier and select Add Section. Enter the Name and Description. For a test, turn on Requires Test and enter the Pass Score %.
- Under Content Items, select Add, and choose Text, Slide (PDF) or Video. A video can be an Embed Link or an Upload File.
- For a test, under Test Questions, select Add, and enter each question as Multiple Choice or True/False.
Changing the settings needs Can manage project tools, which only host staff can hold. Changing the Employers list needs Can approve, reject, flag, and manage all inductions. At organisation level, Tools is only on a host organisation, and needs Can manage organisation tools.
| Permission | Allows |
|---|---|
| Can view the inductions register and worker profiles | Seeing inductions, and opening confidential details with a reason |
| Can create inductions and manage own organisation workers | Creating inductions for your own organisation |
| Can approve, reject, flag, and manage all inductions | Reviewing, flagging, invalidating, deactivating and reactivating, and, for host staff, licences and Create & Approve |
| Can permanently delete induction registrations | Deleting inductions |
Manage includes create, and create includes view. Delete is separate. Learn more about how permissions work.
Creating an induction, or submitting one on the portal, starts its workflow. Neither works until a workflow is bound to the tool.
To choose the workflow, open the Workflows tab of the Inductions settings, and under Review Workflow, choose a workflow or Inherit organisation default. At organisation level, a Locked switch stops projects choosing a different one.
The default template is Induction review: a Review registration decision with Approve, Pre-approve and Reject, then a Final approval decision after a pre-approval. The first assigned reviewer to respond decides. Reject needs notes. Learn more about binding a workflow to a tool.