Incidents and injuries
Report and investigate incidents, including notifiable events.
Part of Quality & Safety.
Found in each project. What's the difference?
Hosts set it up; guests see only incidents involving their own company.
Incidents and Injuries are two registers for recording what goes wrong on site. An incident records an event: what happened, where, who saw it and what was done. An injury records the harm to one person, classified for reporting.
In the project sidebar, under Quality & Safety, select Incidents or Injuries. Each opens on its own register. An injury can be linked to an incident, or recorded on its own.
An incident's status is one of:
- Draft: saved, not yet issued.
- Issued: issued to its distribution list.
- Under investigation: being investigated through its workflow.
- Closed: investigated and closed out.
An injury is Draft or Issued.
Learn more about the register screen.
- On the Incidents register, select New Incident.
- Choose the Incident Type.
- Enter the Date & Time and choose the Location.
- Enter a Description of what happened.
- Under Distribution List, select Add Internal Member and choose the people to notify.
- Fill in any of the other cards that apply, described below.
- Select Save Draft to keep working on it, or Save & Issue to issue it now.
Incident Type and Description are required. Reported By shows your name.
Under Immediate Actions Taken, record what was done at the time. Under Attachments, select Add Attachment to attach a file or a record from another tool. Adding attachments needs Can manage incidents and injuries.
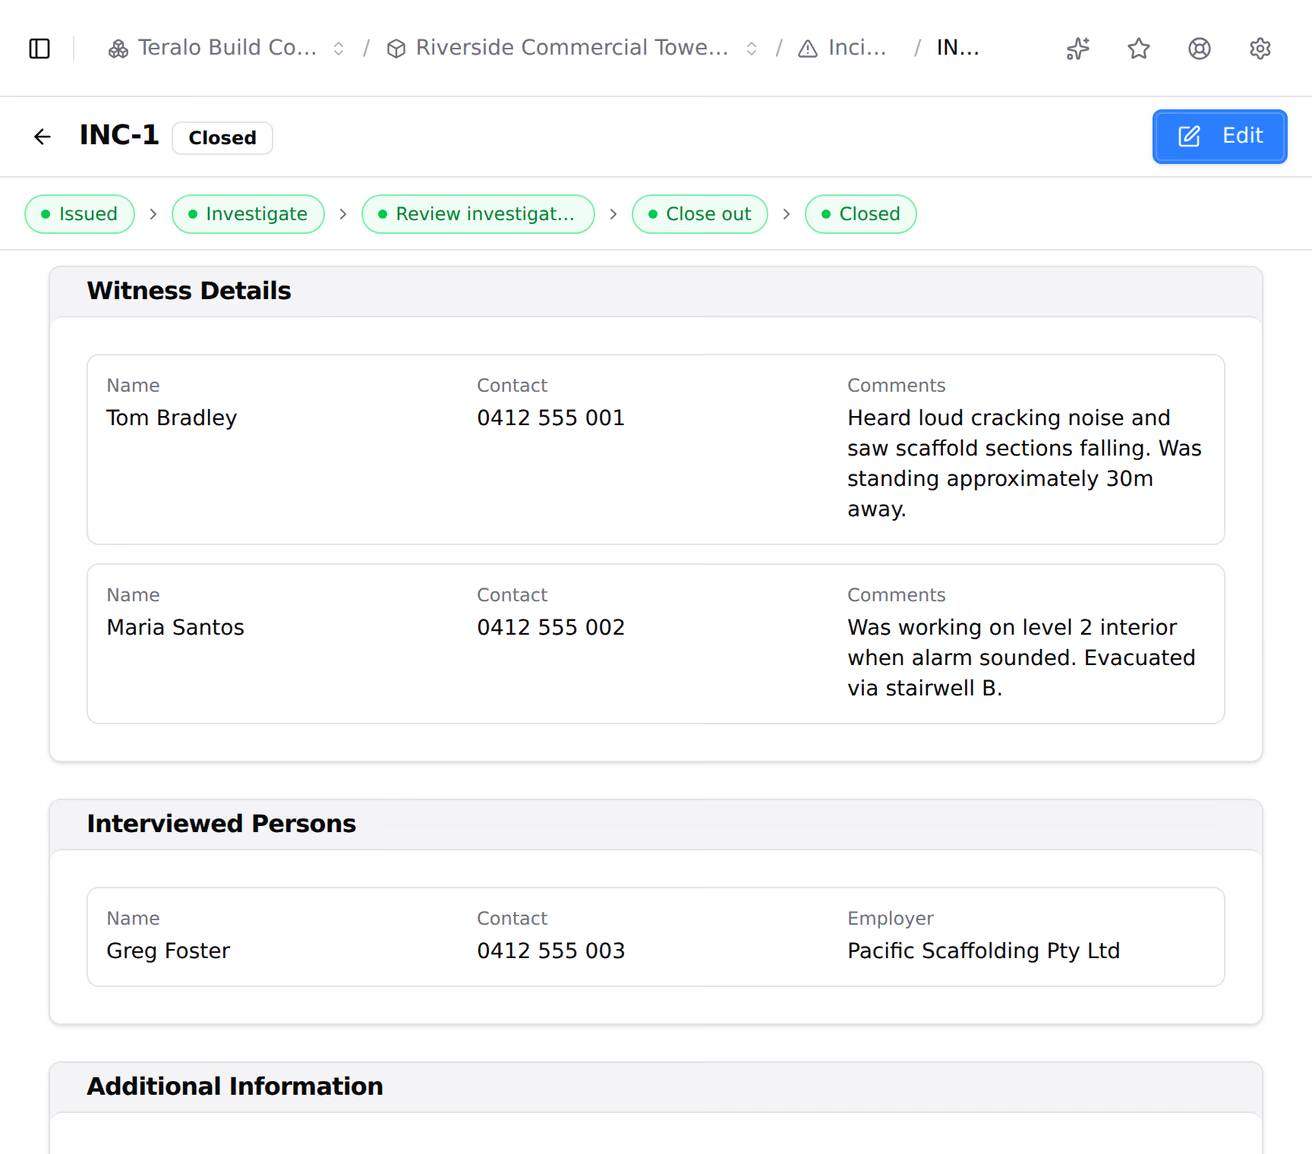
An incident keeps two lists of people:
- Witness Details: the people who saw it happen. Select Add Witness, then enter their Name, Contact and Comments.
- Interviewed Persons: the people spoken to afterwards. Select Add Person, then enter their Name, Contact and Employer.
On the Notifications card, record who was told about the incident:
- Authority Notified: tick it, then enter the Date, the Authority Name and the authority's Reference.
- Client Notified: tick it, then enter the Date and the Client Name.
On the Root Cause Analysis card, enter the Root Cause and the Preventative Actions. Once the incident is issued, only people with Can manage incidents and injuries can edit them.
The Injuries and Observations cards each have Link Existing and Create New. Create New opens a new injury or observation, linked to this incident. Existing injuries can be linked once the incident has been saved.
Creating an observation also needs Can create observations. Learn more about observations.
Issuing an incident:
- marks it Issued, and records who issued it and when;
- emails everyone on its distribution list, except you and anyone who has turned those emails off;
- starts the workflow bound to its incident type.
Warning: Issuing can't be undone. An issued incident can't return to draft or be issued again.
To issue a new incident, select Save & Issue on the form. To issue a draft, open it and select Issue. Issuing a draft needs Can manage incidents and injuries.

People added to the distribution list after the incident is issued don't get the email.
- Open the incident and select Edit.
- Make your changes.
- Select Save Changes.
Editing needs Can manage incidents and injuries, and works in any status. Each save is recorded in the incident's activity.
What happens after an incident is issued depends on the workflow bound to its type. With the default Incident investigation workflow:
- The incident moves to Under investigation, and the person who reported it gets an Investigate task.
- They open the incident, select Complete on the task, and enter their Investigation notes.
- A Review investigation decision follows, with Accept and Reject.
- Then a Close out decision, with Close and Reject. Selecting Close marks the incident Closed.
Rejecting at either decision sends the incident back to the Investigate task.
Incidents don't appear in My Items. An investigation task or decision waiting on you appears under Waiting on you on your dashboard.
- On the Injuries register, select New Injury. Or, on an incident's Injuries card, select Create New.
- Optionally, choose the Linked Incident.
- Under Personal Details, choose the Person Type and Employer, then choose the Injured Person or enter their name.
- Under Shift Details, enter the Shift Start Time, Shift End Time and Main Tasks Being Performed.

- Under Injury Details, enter the Date & Time of Injury, and classify the injury.
- Choose the Treatment Type and whether there was Lost Time: Yes, No or TBC.
- Under Distribution List, add the people to notify.
- Select Save Draft or Save & Issue.
Issuing an injury emails its distribution list. Injuries have no workflow.
An injury is classified against five lists, each taking more than one value:
- Nature of Injury: the kind of harm.
- Bodily Location: the part of the body. You can also mark it on the body diagram.
- Mechanism of Injury: how it happened.
- Injury Agency: what was involved.
- Treatment Type: the treatment given.
Warning: Deleting an incident is permanent, and deletes its witnesses, attachments, activity and workflow run. Injuries linked to it are kept, and unlinked.
- On the register, open the incident's three-dot menu and select Delete Incident.
- Select Delete to confirm.
Open the incident and select Export PDF.
Host staff see every incident and injury on the project. A guest sees:
- incidents their own company reported;
- incidents that hurt one of their company's workers;
- incidents they're on the distribution list of, or take part in the workflow of;
- injuries to their own company's workers, and injuries whose distribution list names them.
No permission widens what a guest sees. A guest reports incidents as themselves or someone in their own company, chooses from the host's incident types, and records injuries only for their own company's workers.
The settings are on the project. In the project sidebar, under Project Settings, select Tools, then Incidents or Injuries.
Incidents has two tabs:
- Incident Types: each type has a Name, a Description and a Workflow. Types set up at organisation level are listed with an Activate switch. To add a type for this project only, select the plus icon.
- Workflows: the workflow templates incident types can use.
Injuries has a tab for each list: Injured Person Types, Nature of Injury, Bodily Location, Mechanism of Injury, Injury Agency and Treatment Types. Each list holds the organisation's values, activated per project, and the project can add its own.
The same pages at organisation level hold the types and lists each project can switch on. A project created with Activate All Templates has every organisation incident type, and every entry on the injury lists, switched on.
| Permission | Allows |
|---|---|
| Can view incidents and injuries | Seeing both registers |
| Can create incidents and injuries | Reporting incidents and recording injuries, issuing them as they're created, and investigation tasks |
| Can manage incidents and injuries | Editing, issuing drafts, attachments, and the review and close out decisions |
| Can permanently delete incidents and injuries | Deleting incidents and injuries |
Manage doesn't include delete. Changing the tool's settings, including the incident types and injury lists, needs Can manage project tools, which only host staff can hold. Learn more about how permissions work.
Each incident type is bound to a workflow, chosen in the type's Workflow field. An incident can't be issued until its type has one: a draft of an unbound type shows No workflow bound to this incident type.
There are two default templates:
- Incident investigation: the investigate, review and close out steps described above. The default incident types are bound to it.
- No sign-off required: starts and ends straight away. An incident of a type bound to it stays Issued.
To act on a decision, a person must be assigned to it and hold Can manage incidents and injuries. Injuries take no workflow.
Learn more about binding a workflow to a tool.