Inspections
Run checklists, ITPs and hold points by location.
Part of Quality & Safety.
Found in each project. What's the difference?
Hosts set it up; guests carry out the inspections assigned to their company.
Inspections runs checklists on the project. Each inspection works through a template's checklist, usually at a location, and records every result, photo and note.
Three things sit behind an inspection:
- Template: the checklist, in sections of items.
- Location: where the inspection happens, from the project's location tree. It's optional.
- Plan: a template scheduled for an inspector organisation, by location, on a frequency, or once.
An inspection started without a plan is an ad-hoc inspection.
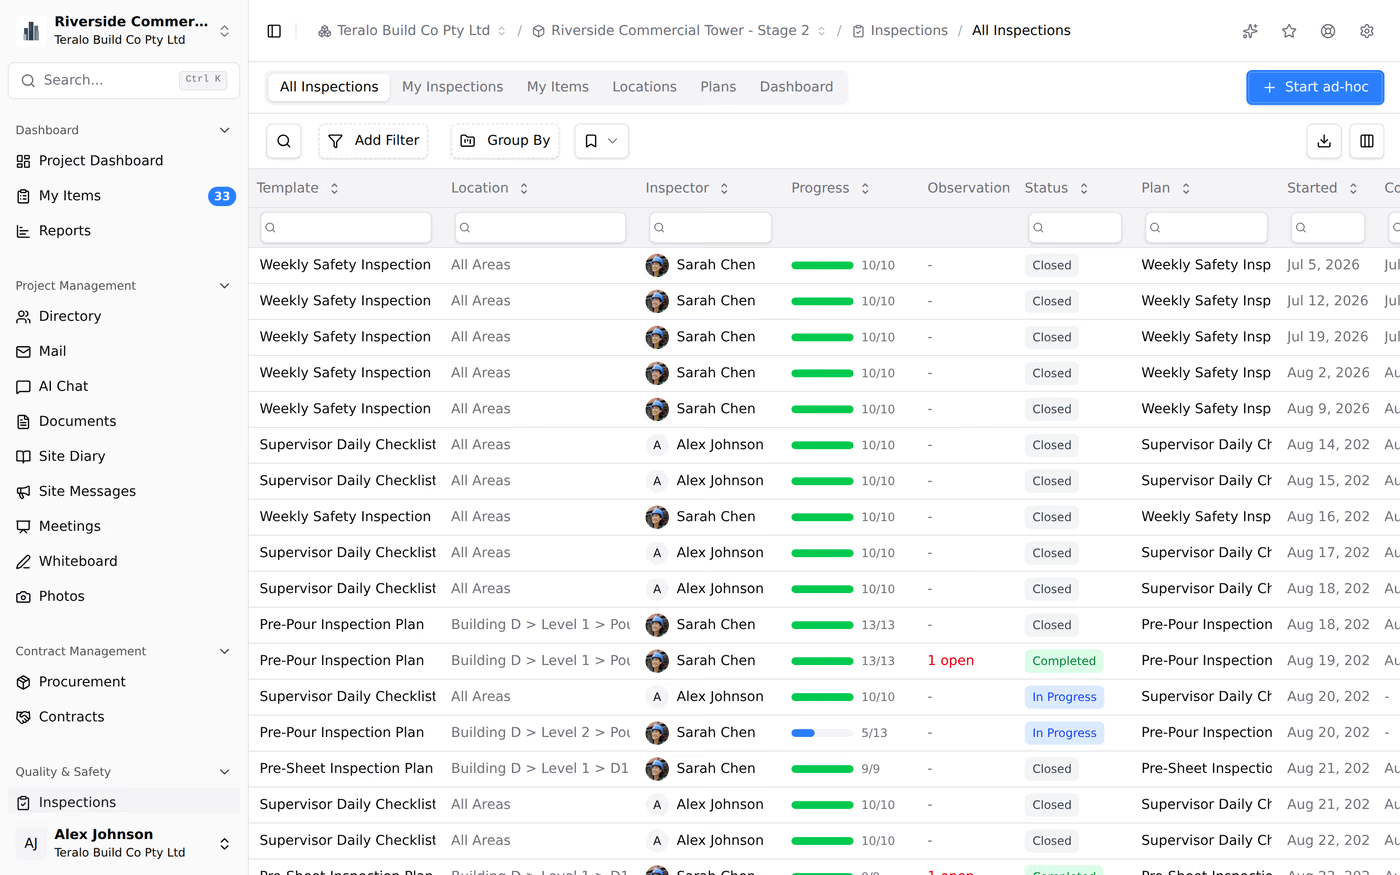
In the project sidebar, under Quality & Safety, select Inspections. The register has these tabs:
- All Inspections: every inspection on the project.
- My Inspections: the planned inspections for you (Mine) and your organisation (Team), grouped as In Progress, Overdue, Due Today, Upcoming, Available and Completed.
- My Items: checklist items your organisation is responsible for, on inspections in progress.
- Locations: the status of inspections at each location.
- Plans: the project's plans. Only people with Can manage inspection templates, plans, and locations see it.
- Dashboard: only host staff see it.
An inspection's status is In Progress, Completed or Closed. Learn more about the register screen.
An inspection and test plan (ITP) is set up in Teralo as a template and a plan that schedules it. Teralo has no separate hold point or witness point setting.
To start a planned inspection:
- On the My Inspections tab, find the inspection.
- Select Start.
To start an ad-hoc inspection:
- On the All Inspections tab, select Start ad-hoc.
- Choose the Template.
- Optionally, choose a Location and enter a Name.
- Select Start.
Teralo records you as the inspector. You can't start an ad-hoc inspection for a template and location that a plan already covers.
Work through each item. How you answer depends on its type:
- Pass/Fail: select the tick for Pass, the cross for Fail, or the dash for N/A.
- Text, Number, Date and Select: enter or choose the answer.
To add a photo or a note to an item, select the item. In the panel that opens, select Photo, or enter a note in Add a note.... To remove an answer, select Clear.
Items marked required must be answered before the inspection can be completed.

- Select the item.
- Select Raise Observation.
- Enter the Description, and choose the Observation Type, Priority and the organisation or person to assign it to.
- Select Raise Observation.
The observation is linked to the item, and the item shows the observation's number. Raising one needs Can create observations as well, and is only available while the inspection is In Progress. Learn more about observations.
A project template can make an item another organisation's to answer, with its Responsible organisation. On the inspection, the item shows that organisation's name and pending.
The organisation finds its items on the My Items tab, under Pending. Once submitted, an item moves to Submitted - Awaiting Review.
- Open the inspection and select Complete.
- Optionally, enter Completion notes.
- Select Complete.
If any required item is unanswered, Teralo tells you how many are left. The inspection moves to Completed.
With the default workflow, a completed inspection closes by itself when none of its linked observations is still open. An observation counts as open until it's Verified or Closed.
Otherwise the inspection waits at a Close out inspection decision, which goes to everyone with Can start and complete inspections. The first to answer decides:
- Close: the inspection moves to Closed.
- Reopen: the inspection returns to In Progress.

- Open the closed inspection and select Reopen.
- Select Reopen again to confirm.
The inspection returns to In Progress, and its workflow starts again.
On the inspection, choose a person under Inspector, or select Take over to make yourself the inspector.
- On the Plans tab, select New Plan.
- Enter the Plan Name and choose the Template.
- Choose the Plan Type:
- Location-Based: one inspection at each matching location.
- Frequency: inspections on a schedule. Choose the Frequency, the Day of Week, the Start Date and, optionally, an End Date and Location.
- One-Off: a single inspection at one Location.
- Choose the Inspector Organisation and, optionally, the Default Inspector.
- Choose the Submission Mode: Shared or Per inspector.
- Select Create Plan.
The frequencies are Daily, Weekly, Fortnightly, Monthly, 3-Monthly, 6-Monthly and Annually. To set due dates on a location-based plan, select Due Dates on the plan.
The plan's inspections appear on My Inspections for its default inspector and its inspector organisation.
Warning: Deleting an inspection is permanent, and deletes its answers, photos and notes.
- Open the inspection and select Delete.
- Select Delete Inspection to confirm.
Open the inspection and select PDF.
A guest sees the inspections their company is responsible for an item on, and the ones whose workflow they take part in, including as the inspector. No permission widens that.
Inside one of those inspections, they see the whole checklist, other organisations' items included. They see the observation numbers only of observations they can see.
Templates, categories and the workflow are set up under Tools, at organisation level and on each project. Locations are a separate page on the project.
- In the organisation sidebar, under Organisation Settings, select Tools, then Inspections.
- On the Templates tab, select New Template.
- Enter the Template Name, choose the Category, and optionally enter a Description.
- Select Add Section, then Add Item for each item. For each item, enter its label, choose its type, and set Required or Optional.
- Select Save Template.
A project created with Activate All Templates gets its own copy of every organisation template. Changing an organisation template later doesn't change those copies.
To add an organisation template to a project that doesn't have it, open the project's Tools, then Inspections, and select Use on Project on the template. A project can also have its own templates, created with New Template there. Only a project template can set an item's Responsible organisation.
Every template has a category. The Categories tab at organisation level holds the organisation's categories. On a project, turn on Activate for the ones it uses, or select Add Project Category.
- In the project sidebar, under Project Settings, select Tools, then Locations.
- Add locations by Manual Entry, Extract from Drawings or Import from Excel.
Locations form a tree. Each project names its own tiers, such as building, level and unit.
| Permission | Allows |
|---|---|
| Can view inspections and results | Seeing inspections, and submitting items your organisation is responsible for |
| Can start and complete inspections | Starting, answering, completing, closing and reopening inspections, and changing the inspector |
| Can manage inspection templates, plans, and locations | Plans, and project templates, categories and locations |
| Can permanently delete inspection records | Deleting inspections |
There's no separate review permission. Manage and delete each include view.
Project templates, categories and locations are on host-only pages, so only host staff manage them. Choosing the workflow needs Can manage project tools, which only host staff can hold. Learn more about how permissions work.
Inspections runs one workflow for every inspection on the project. An inspection can't be started until one is bound.
To choose it, open the Workflows tab of the Inspections settings. Under Inspection Workflow, choose a Workflow, then select Save. On a project, Inherit organisation default uses the organisation's choice. At organisation level, turn on Locked to stop projects choosing a different one.
The default template is Inspection close-out: a Conduct inspection task for the inspector, then the close-out described above. Learn more about binding a workflow to a tool.