Your first week on a project
Getting started on a project: sign in, find your work and get notified.
This article covers what to do after you're added to a project: set up your account and profile, find your way around, and choose your email notifications.
When someone at the host organisation adds you to a project, Teralo creates your account and sends you a welcome email. The email holds your sign-in email address and a temporary password.
- In the welcome email, select Set New Password.
- Enter a New Password, enter it again in Confirm Password, then select Reset Password.
- Enter the 6-digit code from the verification email, then select Verify Email.
The Set New Password link works for 24 hours. After that, sign in at app.teralo.co with the temporary password, and Teralo asks you to choose a new one.
Note: Your account uses the email address the host entered for you. If the welcome email hasn't arrived, check your spam folder, then ask the person who added you to check the address.
If you already have a Teralo account with that email address, Teralo either adds the project to it and emails you, or emails you an invitation. To accept an invitation, select Review Invitation in the email, then Accept. Learn more about project invitations and sign-in problems.
- At the bottom of the sidebar, open the user menu and select Account.
- On Profile, enter your First Name, Last Name, Job Title and Phone Number.
- Select Update Profile.
To add a photo, select the Avatar box, choose an image and select Crop. People on your projects see your name, job title, email address and phone number in the project directory. Learn more about your profile.
- In your account settings, select Security & Access.
- Under Multi-Factor Authentication, select Set up two-factor.
- Scan the QR code with an authenticator app.
- Enter the 6-digit code from the app, then select Enable two-factor.
- Save your backup codes with Copy or Download, tick I have saved these codes somewhere safe., then select Continue.
Learn more about security and two-factor authentication.
Signing in opens your personal dashboard, which lists your organisations and projects. Select a project to open its dashboard, which everyone on the project can open.
The sidebar holds the switcher, the search box and the project's tools, in groups.
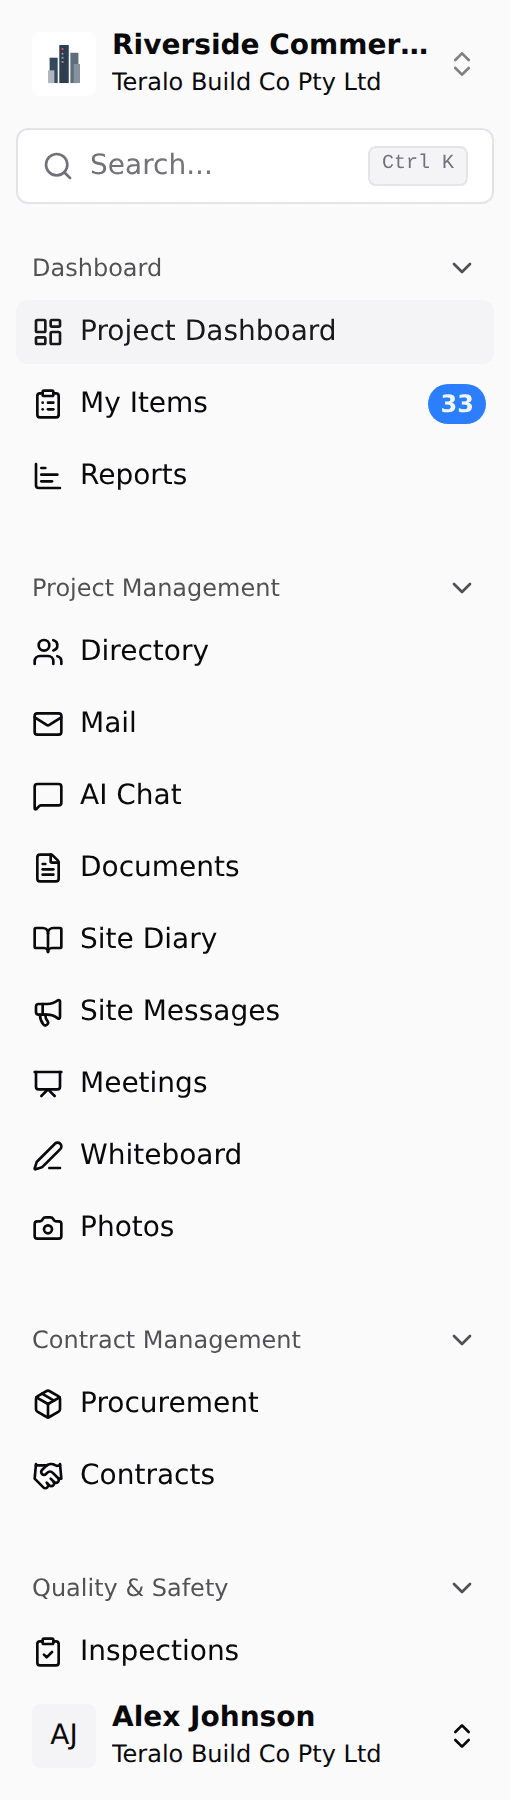
The tools you see depend on your permission template, on whether your organisation is the host, and on the host's plan. The dashboard and My Items always show. If a tool you expected is missing, check the switcher to make sure you're on the right project, then ask the host about your permission template. Learn more about hosts and guests and how permissions work.

- Select Search... at the top of the sidebar, or press Ctrl+K (⌘K on a Mac).
- Enter at least two characters.
- Select a result to open it.
Results are grouped by tool.
My Items in the sidebar lists the records on the project that are waiting on you, with a count beside it. Learn more about My Items.
Most tools open on a register: a table with the same toolbar for searching, filtering, grouping and exporting. Learn more about registers.
Teralo emails you about events on your projects, and every email is on until you turn it off.
- In your account settings, select Preferences.
- Select Notification Preferences.
- Turn off the emails you don't want.
Learn more about notification settings.
Teralo runs in a browser at app.teralo.co, in a desktop app for Windows, macOS and Linux, and in a mobile app for iOS and Android. You sign in to each with the same account. Download them from the downloads page.
Learn more about the mobile app and the desktop app.