Project Drive
Share a project's working files in folders, company by company.
Found in each project. What's the difference?
Hosts share each folder; guests see only the folders shared with them.
The project Drive is each project's own file library: folders of working files, shared folder by folder with the companies on the project. It appears as Drive in the project sidebar, below Documents.
The project Drive is separate from the project's Documents register, and its files have no document numbers, revisions or transmittals. Your organisation's Drive, in the organisation sidebar, is another separate library.
The Drive opens on the List tab at its top level. Select a folder to open it, and a file's name to preview it. Tiles shows the same items as thumbnails. The path above the list shows where you are: select a folder in it to go back up.
The list's columns are Name, Modified, Size and Uploaded by. A label such as v2 beside a file's name is its version number, and a shield means the folder or file has access of its own.
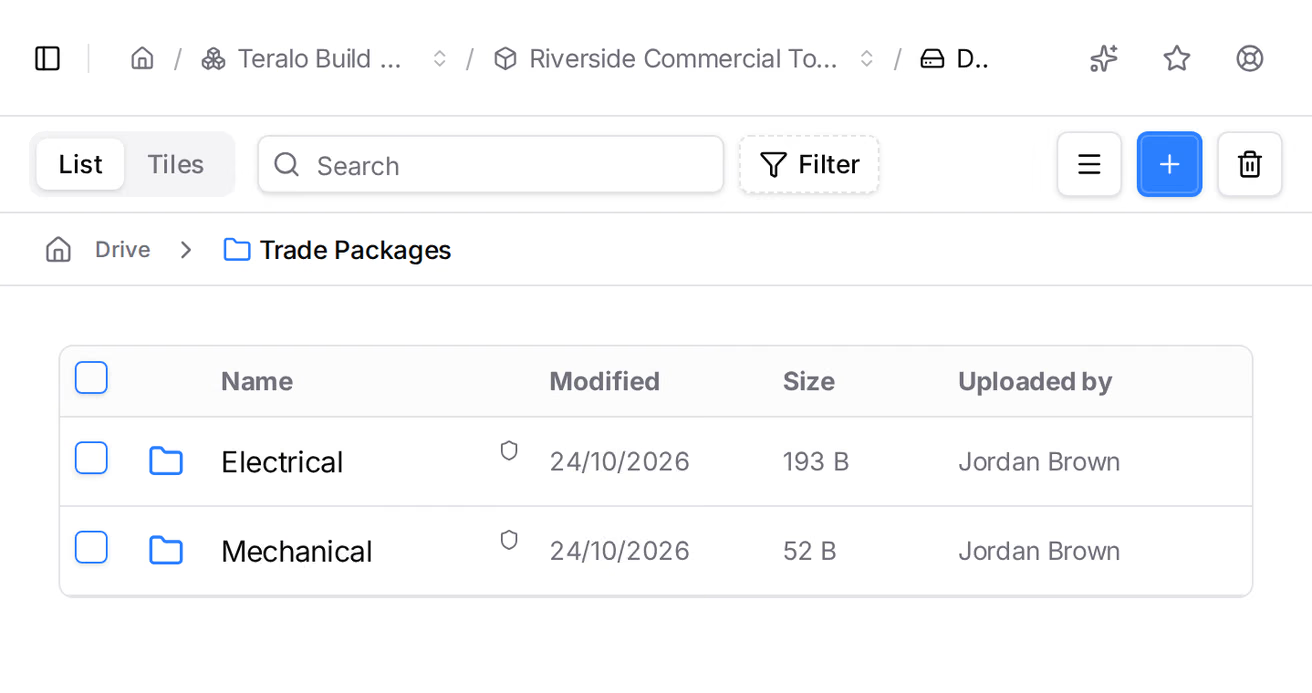
On a wide screen, the folder tree sits beside the list. On a narrower screen, select the menu icon at the top to show it.
Word, Excel and PowerPoint files open in the preview too. The project Drive has no editing in Microsoft 365 for the web and no Edit in desktop app. To change a file, download it, then upload your edited copy as a new version.
- Open the folder to upload into.
- Select Upload. On a narrow screen, select the plus icon, then Upload files.
- Drag files onto the dialog, or select it to browse for them.
- Select Upload.
You can also drag files from your computer onto the page, or onto a folder. A file whose name is already taken in the folder gets a number added, such as report (2).pdf.
- Open the folder to create it in.
- Select New Folder. On a narrow screen, select the plus icon, then New folder.
- Enter the Folder Name and, if you want one, a description.
- Select New Folder.
A new folder takes the access of the folder that holds it.
- Select the three-dot menu on the row, then Rename, Move to or Copy to.
- Complete the dialog:
- Rename: enter the New Name, then select Rename.
- Move to or Copy to: open the destination folder in the dialog, then select Move Here or Copy Here.
To move or copy several items, tick them, then select Move or Copy in the bar at the bottom of the screen. You can also drag a file or folder onto another folder, in the list, the folder tree or the path above the list.
- A copy of a file has
(Copy)added to its name, such asreport (Copy).pdf. - Copying a folder creates an empty folder with
(Copy)added to its name. The files and folders inside it aren't copied. - A rename or move to a name already taken in the folder is refused. Names are compared without regard to capitals.
- A file or folder moved into another folder takes that folder's access, unless it has access of its own.
- Select the three-dot menu on the file's row, then Supersede.
- Drop the new file onto the dialog, or select Choose File.
- Optionally, add a comment.
- Select Supersede Document.
The file keeps its name, with the new file's extension, and its version number goes up by one. To see the files it replaced, select the three-dot menu, then History. Each replaced file is marked Superseded and can still be downloaded.
- One file: select the three-dot menu on the row, then Download.
- Several files: tick them, then select Download in the bar at the bottom of the screen. Teralo downloads them as one zip file.
Folders can't be downloaded. To download a folder's files, open the folder and tick them.
Only host staff see Manage Access, with the host as their active organisation. Changing access needs permission to add to the project Drive, and Manage on the folder.
- Select the three-dot menu on the folder's row, then Manage Access.
- Under Grant New Permission, choose from Company or project role:
- a company on the project, under Companies;
- a project permission template, under Project roles. It covers everyone on the project who holds that template, whatever their company.
- Tick the Permission Levels to give.
- Select Grant Permission.
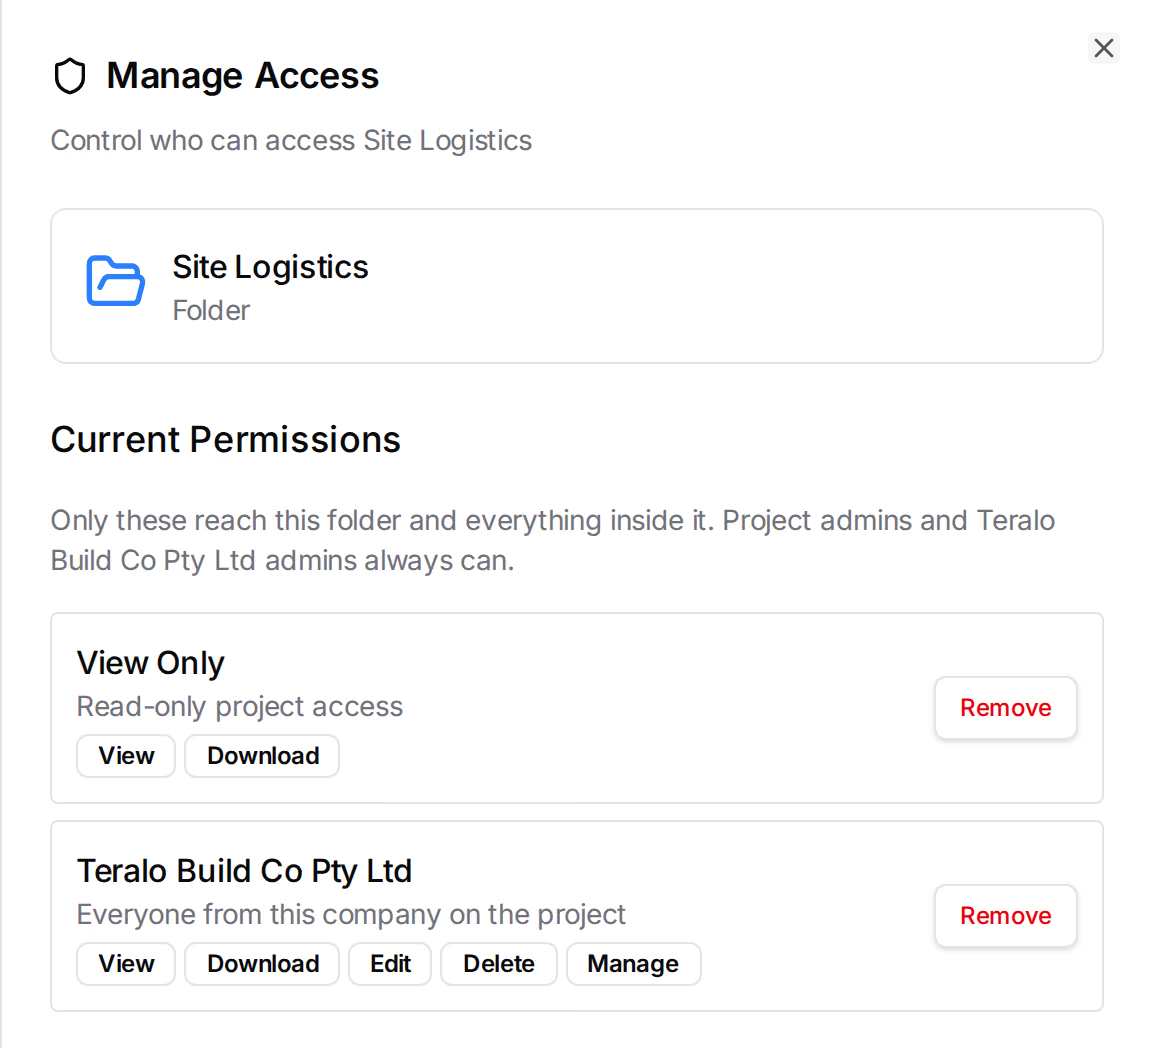
The first time a folder is shared, its list starts with the access it had before: the access of the nearest shared folder above it, or, when nothing above it is shared, the host company with every level. Granting adds to that list. To take someone off it, select Remove beside them.
To share a single file, select Manage Access on the file's row. The levels are under Access Levels, and a file's access can only narrow its folder's.
The project Drive has no public links.
A folder's access decides which companies and project permission templates can reach it, and what they can do there.
- A folder nobody has shared is open to host staff only. Other companies can't see it.
- Sharing a folder covers everything inside it, until a subfolder has access of its own.
- Another company sees the folders above a folder shared with it, so it can reach that folder, but not the files in them.
- Files at the top level of the Drive, outside any folder, are for host staff only. Other companies can't add files or folders there.
- Project administrators and the host organisation's administrators reach every folder.
The levels are:
- View: see the folder and open its files.
- Download: download files and copy them.
- Edit: upload files, create folders, and rename, move or supersede files. It includes Download.
- Delete: move files and folders to the trash.
- Manage: change who has access. Only host staff can hold it. Another company given Manage gets the other four levels.
Every level includes View. Access only narrows what a person's permissions allow: they also need the project Drive permissions in their project permission template.
- Select the three-dot menu on the row, then Delete.
- Select Delete to confirm.
To move several items, tick them, then select Delete in the bar at the bottom of the screen. A folder goes with everything in it. Items stay in the trash for 30 days, then Teralo deletes them permanently.
- Select Trash at the top of the Drive. On a narrow screen, select the bin icon.
- On the item, select Restore.
The trash shows who deleted each item, where it was (Was in), and when it will be deleted permanently (Deleted permanently). You see only the items you could see before they were deleted. Restoring a folder brings back everything deleted with it, and an item whose name has been taken since comes back with a number added.
Warning: Deleting from the trash is permanent, and deletes every version of each file.
- One item: in the trash, select the bin icon on the item, then Delete permanently.
- Everything: in the trash, select Empty trash, then Empty trash again to confirm.
- The search box above the Drive finds files and folders in the folder you're in.
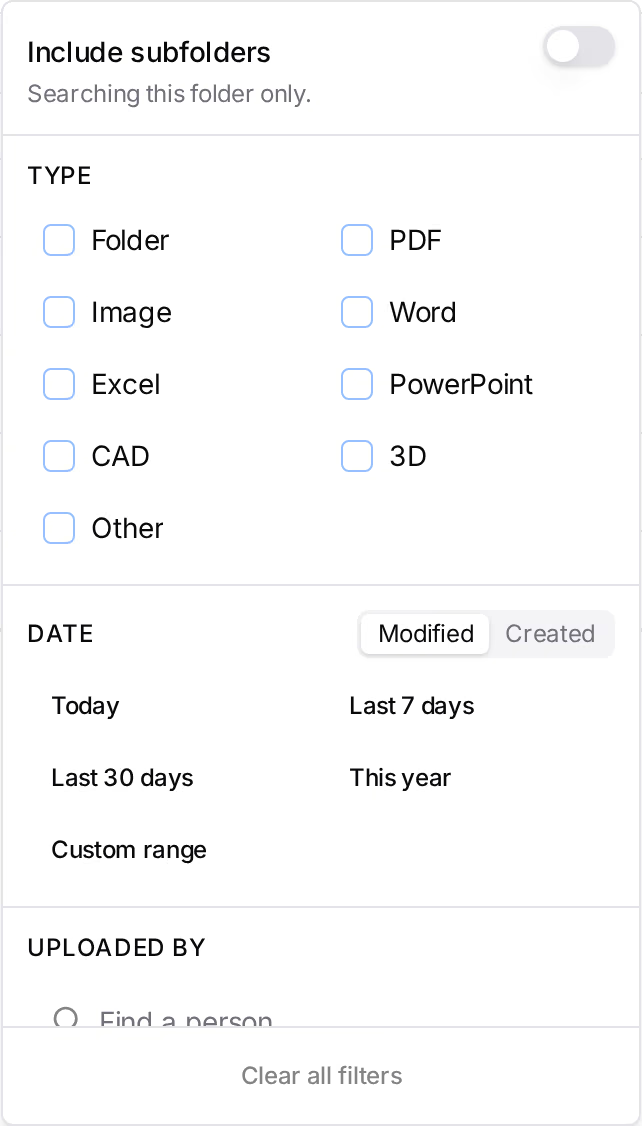
- To search the folders below it too, select Filter, then turn on Include subfolders. Filter also narrows the list by Type, Date and Uploaded by, and Restricted only shows the items with access of their own.
- To find a file from anywhere in the project, use the search at the top of Teralo (Ctrl+K, or ⌘K on a Mac). It matches file names, lists them under Drive, and opens the folder that holds the file. It shows only the files you can reach.
Searching at organisation level doesn't include project Drives.
A project's Drive counts towards the host's storage on that project, whoever uploaded the files. Files replaced by a new version still count, and the trash doesn't. Learn more about storage limits.
When a project is imported from a Procore export with the Windows desktop app, the files in the export's Documents folder land in the project Drive, in the same folders. An imported folder joins a folder of the same name already in the Drive, and a file whose name is taken gets a number added.
The import needs permission to add to the project Drive, and Edit on the folders it adds to. Learn more about importing a project from Procore.
With Teralo Drive turned on, each project's Drive also appears on your computer, as a Drive folder in the project's folder. It needs a desktop app newer than version 26.25.
| Permission | Allows |
|---|---|
| Can view the project Drive | Seeing the Drive, and opening the files your folder access allows |
| Can add to and change the project Drive (upload, create folders, rename, move, copy, supersede and restore) | Uploading, creating folders, renaming, moving, copying and superseding, and changing a folder's access (host staff only) |
| Can delete files from the project Drive | Moving files and folders to the trash, restoring them, and deleting them permanently |
Each permission works only as far as a folder's access allows. On an archived project, the Drive is read-only.
In the default project templates, Project Director and Office Team have all three permissions. Site Team, Client, Superintendent, Consultant and Subcontractor Manager have the first two, and Subcontractor Supervisor and View Only have Can view the project Drive.